Yesterday I got to make a special birthday present for my brother, check it out! This is the coolest set of custom scales I've made yet!
Saturday, November 26, 2011
Saturday, November 19, 2011
Project updates
I posted a video about some of the work I've been up to lately. Knifemaking Tuesday week 02 went great but I didn't get any shop time unfortunately, but I did get to spend the day on my computer designing my first knife! I got it fully designed, next tuesday I'll start cutting it out.
Friday, November 11, 2011
Eastwood tumbler wins again
These blades have spent the past 41 hours in my Eastwood Tumbler getting deburred and polished, and I finally got a good picture of them! The tumbler really finished them off nice. The blade pictured upper right with the funky edge, I gave that a quick once over on my small 1x42 belt grinder with a 240 grit belt before tumbling, that took off the milling marks and left a really nice looking grind. The Anso blade bottom right I put a quick edge on it, the front edge looks nice and manly. Ignore the terrible jimping on that one, I used a long 1/16" drill bit and it kept going off center when drilling the holes, they should be spot drilled first. But for the one on the bottom left I didn't grind it at all, that's right off the machine and into the tumbler, great finish! All it really needs is a quick buzz on a scotchbrite wheel before tumbling then I'll be super happy with it. (note to self, buy scotchbrite wheel)
What do you guys think?

What do you guys think?

Wednesday, November 9, 2011
Knifemaking Tuesdays - Week 01
A few days ago I was chatting with my wife about how I never seem to have enough free time to spend working on my new custom knives. I've got 100 ideas bouncing around my head but never any time to try them out. So she suggested that I take one day a week to guilt-free design and practice making my knives! Awesome! Now we have Knifemaking Tuesdays.
Today's project was to figure out how to fully machine a knife blade so that it doesn't have to spend any time on a belt grinder. I made 4 different designs and after a lot of practice I finally figured out how to render a blade profile in Solidworks, now that I have that skill I can design pretty much any shape! Once I had the code written I spent a few hours with my cnc mill cutting out the first batch, surprisingly everything went very smoothly. I got to try different parameters for each one to see what I could get away with, the one pictured lower left turned out soooo wonderful. I've got all 4 blades broken apart now and they're currently in my tumbler where I'll leave them all night and probably most of tomorrow.


Check out this video describing the whole process of the day.
It's been a while, but I sure have been busy!
It's been a month and a half since I last posted, I find that it's much easier to make youtube videos with updates than it is to keep the blog updated, so to keep track of all the new cool stuff I'm working on it's best to subscribe to my youtube channel here: http://www.youtube.com/JohnGrimsmo
The past month I've spent a lot of time trying to perfect my Paramilitary 2 handles, I've made 3 sets so far and they're all wrong, the nested liners don't line up with the clip and pivot holes in the scales so it just doesn't work at all. It will simply be a matter of trial and error until I get them perfect, once that happens then they will be very repeatable and every one will be exact.. Ahh the joys of CNC machining! I just got a big sheet of lightning strike carbon fiber in the mail today, this is the perfect thickness for Para2 handles.
Last week I got to play with a lot of titanium. Norman from NukoTools contacted me and asked if I could do some engraving for him. He makes titanium knuckels (like brass knuckles but obviously in Ti), and he needed 160 of them engraved with his logo. It was really fun to finally get to work with titanium. I used a 1/16" carbide ballmill, 0.005" depth of cut, 4500rpm, and feedrate was 2.7ipm (thank you Gwizard for suggesting these feeds/speeds!). Here are a few videos describing the process, and also how we anodized a bunch of them for fun.
I also got to finally try a new pattern on my Spydero Manix 2 handles, Dragon Scales! I'm working with a local artist who is amazing he hand drew the pattern for the scales and then I copied it into the CAD program. Check out these pictures and videos!


Friday, September 23, 2011
Engraving
I've been doing some cool engraving lately, it takes a long time (hours) to render the engraving and produce the code, but the actual engraving part only takes 10 minutes or so.
This is an AG Russel Acies knife that belongs to my buddy Shaun, together we anodized it to 45v which produced a light green almost yellow color, then I engraved it with this celtic cross that he provided. Engraving Ti let me get super duper fine detail, and it turned out amazing!

 This is one of my toxic green manix handles that I engraved with CustomSpyderco.com's logo, he's going to start carrying my scales in his store which will give me some good exposure in that part of Europe!
 Tomorrow I'm going to a Toronto area USN knife meet, and we were asked to provide a giveaway prize. Shaun offered this survival container and did the foam pad with biohazard logo, and I did the engraving today. Considering that the lid is stamped aluminum and nowhere near flat, I think the engraving came out pretty well. It's really deep, but in a way that makes it look even cooler.


This is an AG Russel Acies knife that belongs to my buddy Shaun, together we anodized it to 45v which produced a light green almost yellow color, then I engraved it with this celtic cross that he provided. Engraving Ti let me get super duper fine detail, and it turned out amazing!


Monday, September 19, 2011
Renderings
Had a guy on youtube ask me if I can make my toxic green manix scales with the Umbrella Corporation logo on it, from the movie series Resident Evil. Here's my rendering of what it will look like in 3 color anodizing! Not easy to do, anodize in 3 colors for an intricate pattern, but if he wants to go ahead with it it will be a lot of fun to do and the results will be fantastic.

Also making good progress on my Spyderco Paramilitary 2 handles. The first picture shows the digitized outline of the stock handle, this is where I put the handle in my CNC mill and actually use the mill to measure the outline of the part point by point by point, every 0.025". Then I take it in to my CAD program and make a design from it, which is pictured below in red.


Also making good progress on my Spyderco Paramilitary 2 handles. The first picture shows the digitized outline of the stock handle, this is where I put the handle in my CNC mill and actually use the mill to measure the outline of the part point by point by point, every 0.025". Then I take it in to my CAD program and make a design from it, which is pictured below in red.


Sunday, September 11, 2011
4 Sevens flashlights
Check this out, at the USN show I got to meet the guys from 4Sevens. I've been purchasing from them for 2 years now, they were my first and only source for high end LED flashlights. So in this vid I basically interviewed Trevor on the spot and he went over some of their cooler lights:
More Manix 2 videos!
This video I'm pretty proud of, while making a set of scales I set the camera on the tripod and shot 10 seconds of footage with every tool change, so that you get a good sense for what it takes to make these things. The video is incredibly shorter than the actual process, which makes it great for shorter attention spans.
This video shows some pockets that I made to the back of the handles to reduce the weight a bit, this actually takes 25% of the weight off of each handle! And it brings the weight exactly even with G10, which is pretty awesome. Later in the vid I strength test them, because the leftover area is pretty thin, so I jab it with a screwdriver trying to dent it:
Here I'm engraving a wicked biohazard logo onto the toxic green anodized Manix scales. Using a 1/16" ballmill and around 4500rpm, it does a good job. Normally I would flood this with coolant, but for the clarity of the video I left it dry. I'm only cutting down 0.003", which is about the thickness of a human hair.
Benchmade Griptillian scales?
At the USN show a nice chap named Tom Jones came up to me, no not the famous singer, a friendly guy from England. He loved my manix 2 scales but didn't have one, nor did he really want one, but he had a whole list of other knives he wished I made handles for. One of which was a Benchmade Griptillian. He let me borrow his so that I could digitize it and make some scales for it, so that's on the list of projects right after the Para2.
Paramilitary 2's galore!

The grey one is a sprint run Para2 in CTS-20CP steel, a pretty wicked and rare find, I traded for it at the USN show last weekend. Love this knife too, it's even sharper than the black one.
So, obviously, now that I have TWO paramilitary 2's, one or both of them need custom scales, and so do you. Here's a vid just going over these knives and a few others:
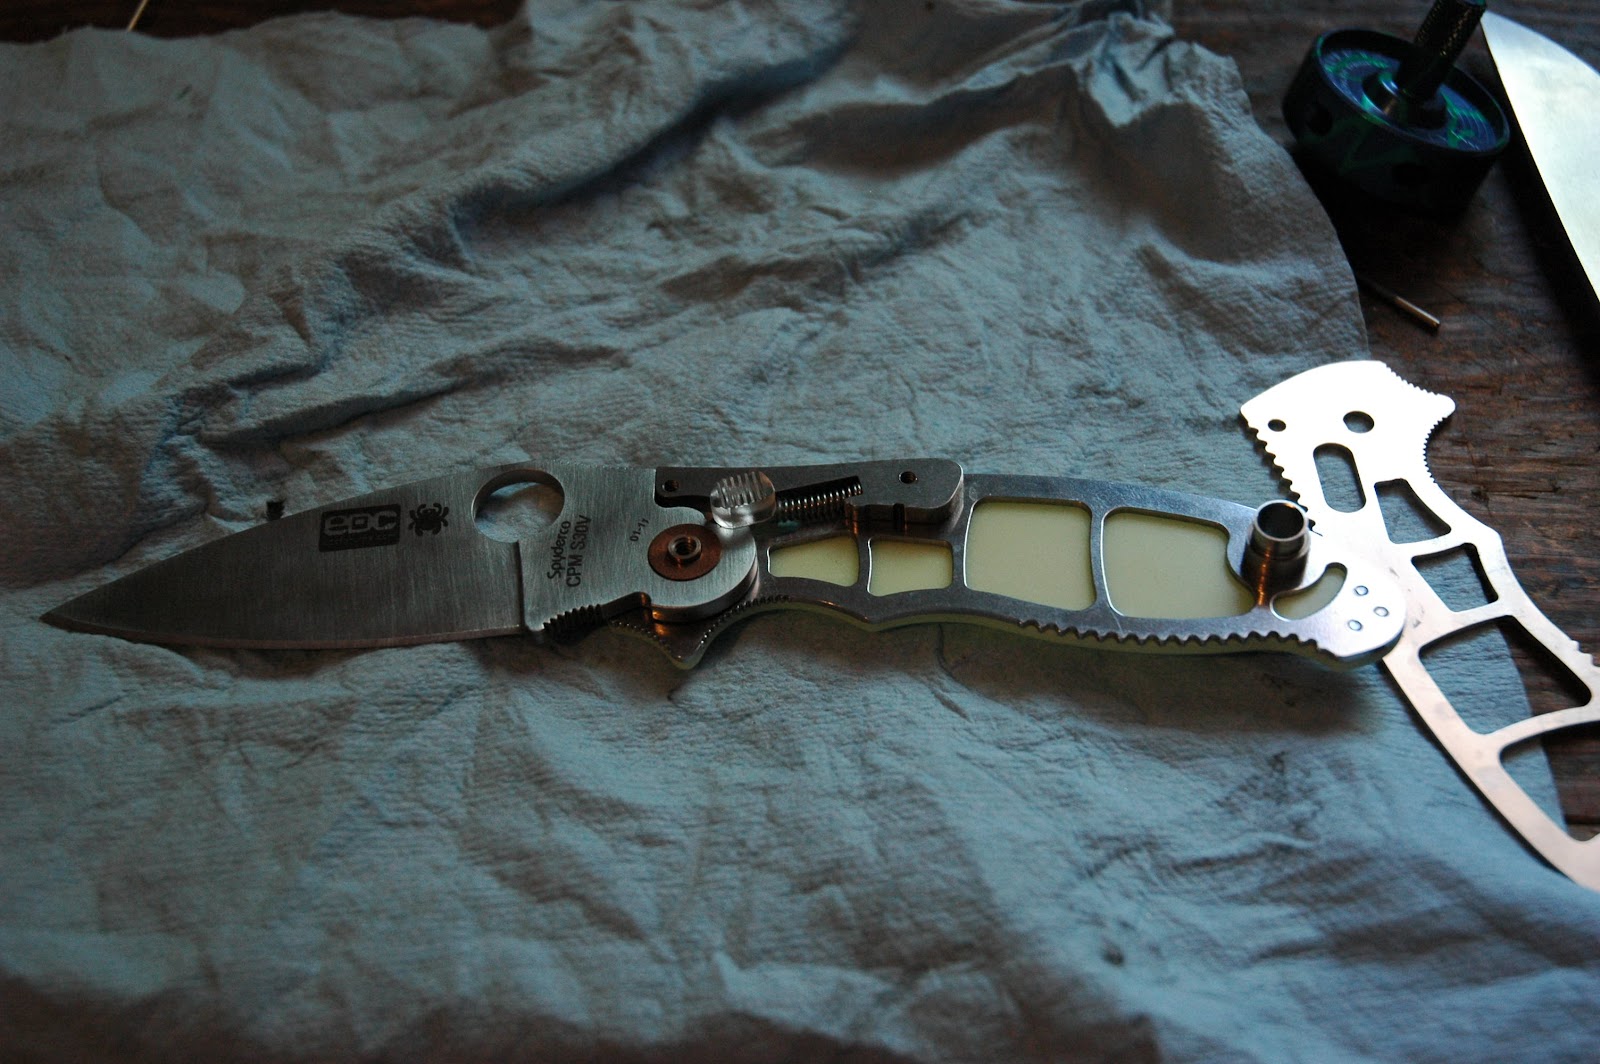
Yesterday I tore the black one apart to see how difficult it will be to make scales for it, and although it does require milling on the inside, it shouldn't be a big deal at all for me to tackle. First step is to digitize the handles inside and out, then onto designing them in CAD. This vid shows my first tear down of this knife:
Went to Vegas!
Last weekend I was able to fly out to the USN Knife Gathering in Las Vegas, it was an incredible experience! I took a bunch of video while there and have edited it all together, check it out!
Pics here:

Borrowed Doug Ritter Griptillian on the left, and Doug Ritters personal EDC knife on the right, he was a really great guy to chat with!


Neptune from Neptuneknives.com, he's a big youtuber and bought 4 sets of handles from me.


Borrowed Doug Ritter Griptillian on the left, and Doug Ritters personal EDC knife on the right, he was a really great guy to chat with!


Neptune from Neptuneknives.com, he's a big youtuber and bought 4 sets of handles from me.


Wednesday, August 10, 2011
Parmilitary 2?
So I'm trying to figure out the next knife to make custom handles for and the Spyderco Paramilitary 2 has me interested. Stock it's got really nice G10 handles, but man, how sweet would that knife be with anodized aluminum handles? Maybe with some cool texturing on the front? I want them to weigh about the same as the stock handles, so if I have to mill some pockets on the backside to lighten them up then I'll definitely do that. G10 seems to be about 75% the weight of aluminum, so it shouldn't need too many pockets to get it light enough.
I can't make glow scales for this knife because it doesn't use liners, it's just straight up G10 with small nested liners for the compression lock. It relies on the structural integrity and robustness of the G10, glow unfortunately isn't nearly as tough. However aluminum should do the job nicely!
Here is spyderco's official picture of the Paramilitary 2:
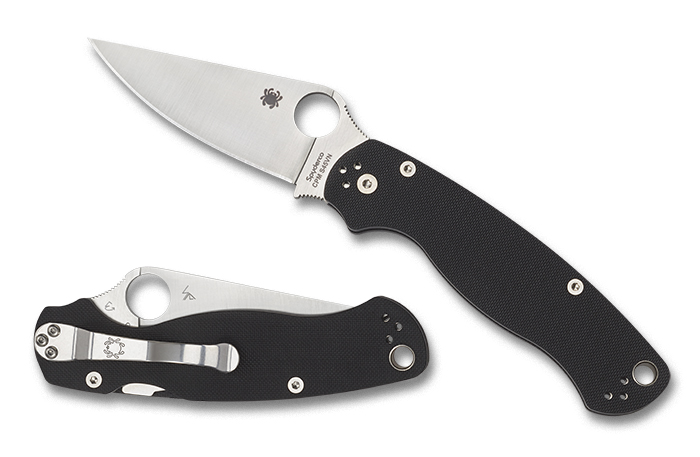
Videos for the Manix scales
Here are some vids that I posted about the aluminum manix scales. Next time I make some I will be sure to get some video of the CNC mill in action!
Lots of new projects
Since making the Rat 1 scales I've been working on scales for the Spyderco Manix 2 knife. Since my glow material is so expensive I made the first set out of aluminum, which is relatively cheap and I can purchase as much as I want from the metal store 5 minutes away. Once the stock handle is digitally profiles and put into my CAD program, I then have to figure out what tools I need to make it, and how I'm going to hold the material while cutting it. Then I have to tell the CAM program how to do all of those operations and it will spit out a rough "G-code" file, it's a text file which tells the machine where and when to move, in an XYZ coordinate system. I often find myself heavily editing this file as I make the first few prototypes to make the job run smoother.
Here is the first set of handles that I made for the knife. Nearly perfect, with a few tweaks to do next time. I machined that wicked striped pattern into the top, it really reflects the light in cool ways. As is, they don't offer much grip, so I think I'll work on incorporating some grooves for traction, or maybe a completely sculpted face.


Here is what the knife looks like partly disassembled.
The first 18 pair finished, glowing in my dark shop.

This is what my milling machine looks like when I turn out the lights at night!

Here you can see how I've made a much needed improvement to the stock knife. Normally the end of the scale is pressed onto that lanyard tube very firmly, and it uses that friction as the sole attachment point for the back half. So instead of requiring a press fit I made my lanyard holes a little oversized, then include 2 phillips screws that are countersunk into the middle clip hole. If you're using a clip, you only need one screw, but I'm including two with every kit, in case you want to run without a clip, or if you lose one.

First round of boxing and shipping getting underway! Exciting.

Here I finally got around to anodizing these aluminum handles, I chose my Toxic Green color because it looks wicked. The ones on the left have been beadblasted, the right ones are just the machined finish. I like machined finish best, but hey that's just me.


Wednesday, June 22, 2011
Rat 1 hold downs
 Got some more work done today. Originally I was having trouble with the middle of the glow scales bowing up, so when I used my corner rounding tool it wouldn't round all the corners evenly (cause it wasn't flat). Well, I think I've cured that problem! Check out my new 1/8" thick aluminum hold downs, these should keep that glow material nice and flat. I even made little cutouts so that I'd have room to do the engraving for JG on the right and 1/100 on the left. It's almost a shame that these are just a fixture tool.


Rat 1 glow scales
 I just came out with these amazing glow in the dark scales for the Ontario Rat 1 knife, they turned out wicked! I'm using the same material that spyderco/EDC used on their Manix GITD. This will be a no money down sprint run of 100 pairs, payment due when I'm finished making them. You can sign up now to get in line by posting a comment or sending me a message.
The price is $110 USD shipped worldwide for a pair of scales. For this first run I will only sell them in pairs. I'll release payment info (paypal) once they're ready to ship.
These will all be engraved with my JG logo and the numbers 1/100, 2/100, etc. All the edges are rounded over and all the screw holes are deburred. They feel really nice, and boy do they ever glow! Especially when charged up by sunlight or a really bright LED flashlight. I posted a bunch of awesome videos on my youtube channel, which can be viewed here. www.youtube.com/johngrimsmo


Tuesday, June 21, 2011
Welcome!
Hey guys thanks so much for checking out my brand new blog. I hope to keep it updated with all the fun and amazing projects that I'm working on, as well as keeping you informed of product availability and sales.
Subscribe to:
Comments (Atom)